SIMULATOR SHOPPING? CONTACT US FOR BEST PRICING
CARL'S PLACE PREFERRED GOLF IMPACT SCREENS (OPTIONS)
SKU 7504_sku
C$550.00
FINISHING STYLE
Please choose
SIZE
In stock: 3 available
CARL'S PLACE PREFERRED GOLF IMPACT SCREENS (OPTIONS)
Product Details
Free Shipping - Final Price - No Tariff
Custom Sizes Available - Contact Ussales@topnotchgolf.ca
(902) 620 0824
Flexible, Versatile, and Functional
These impact screens can be attached to your own frame, used with one of our popular golf enclosures, or part of your own DIY golf simulator creation. Whichever way you go, you'll have a vivid, clear picture while practicing your golf game.
Durability Built In
Proven strength from the impact of golf balls. Lasting quality after being pummeled by golf balls traveling up to 250 miles per hour for thousands of tests.
Customize Your Impact Screen
Choose one of our standard-size golf impact screens which fit the most popular room sizes. See screen dimensions. Or, if one of Carl's Place screen sizes, finishes, edges, or material options don't fit exactly what you need, we'll custom make it, just for you. Because we sew our golf impact screens in-house, by the experts who designed the original Standard, Preferred, Premium, and High-Contrast Gray golf simulator screens.
Clear, High-Quality Images
Our tightly woven, multilayer golf projector screens result in a smoother, crisper image for your golf simulator. And a smooth, non-grainy, HD image makes for more realistic indoor golfing. So real, you'll be looking for a beverage cart!

Standard golf impact screen (far left)
• Budget material perfect for beginners
• 100% heavy-duty polyester
• Loosely woven
Preferred golf impact screen (center left)
• Smoother surface for better image quality
• 100% heavy-duty polyester
• Strong silicone reinforcement
• Tightly woven knit
Premium golf impact screen (center right) RECOMMENDED
• Smoothest surface available
• Superior image quality
• 3 layers of heavy-duty, impact-resistant polyester
• Noise-dampening center layer
High-Contrast Gray Premium golf impact screen (far right) RECOMMENDED
• Same top-of-the-line material as our Premium screen
• Allows for deeper blacks and richer colors
• Great for areas with more ambient light
Finishing Styles Explained
Classic

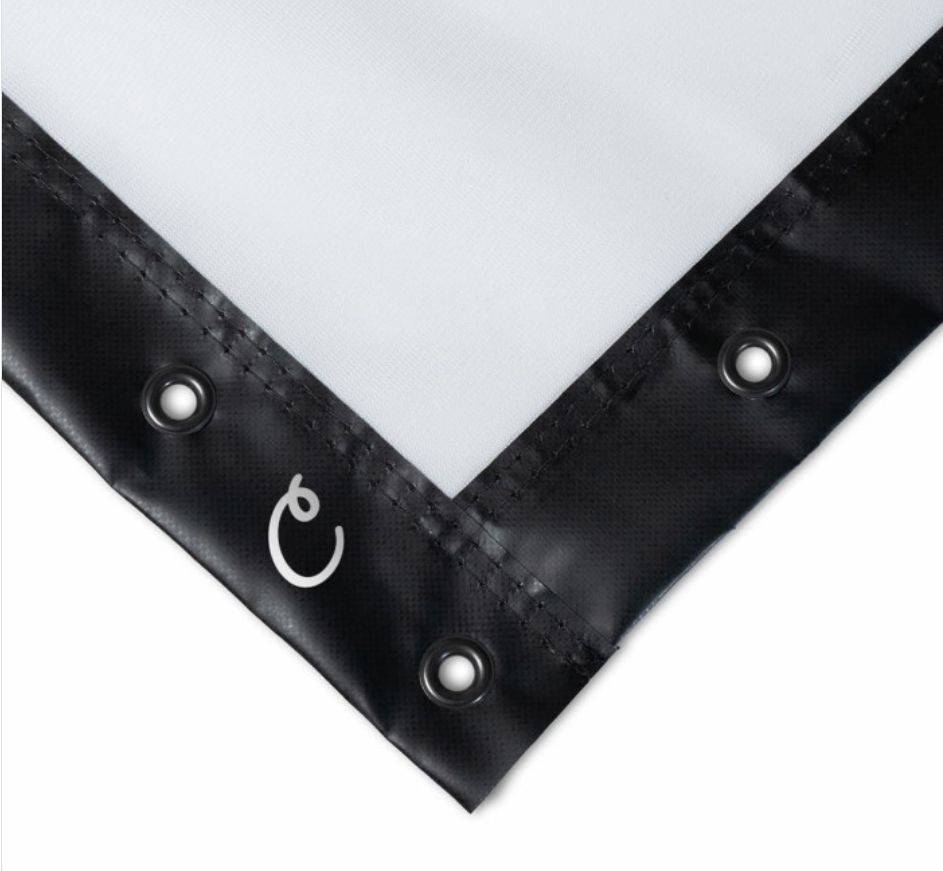
• 2.5" black vinyl edging
• Grommets sewn around the screen
• Convenient to mount your screen with bungees
Classic with Flaps

• Classic style enhanced with sewn-in 7" nylon flaps
• Flaps let you insert safety cushions to protect your frame
• 1" strip of loop fasteners along the flap edges
• Gives you options to hide the grommets
Classic with Loop Fasteners

• Classic style enhanced with a 1" strip of loop fasteners
• Strips let you attach curtains, nets, or safety cushions
• Great for the DIYer
Know the Actual Screen Dimensions
For exact screen dimensions, see this Golf Impact Screen Specifications chart.
Check Your Room Space & Buffer Space
This article, 'How to Select the Best Golf Screen Size' gives you everything you need to choose the right screen size and aspect ratio for your space.
Evaluate the Height and Accuracy of the Golfers
Wild swing? You need more room.
FAQ
Which golf impact screen is best for my needs?
There are several key deciding factors when choosing a golf impact screen. Check out this article on comparing screen materials to help guide you to the screen that is the right fit for you.
Which golf impact screen is best for HD/4K UHD images?
All of our golf impact screen materials are compatible with 4K/HD projection, though your projector, of course, will need to be capable of projecting a native 4K/HD resolution. Carl's Premium and High-Contrast Gray impact screens have very little texture and provide the sharpest possible picture for your high-definition and 4K images.
Can golf impact screens be used for rear-projection?
All golf impact screens are front projection only.
When will I start to see wear on my golf impact screen?
All of our impact screens are heavy-duty fabrics tested to withstand thousands of strikes at up to 250 miles per hour, exceeding the highest Pro average ball speeds of just over 180mph. However, like any material, they will show wear. Many of our golf screens are used in commercial facilities where they are being struck constantly all day long. Depending on if the screen is being used commercially or in a home, as well as the style, ability, and frequency of the user will all contribute to the service life of a screen.
How far away should I stand from my impact screen?
For the safety of both the golfer and the screen, we recommend standing a minimum of 10-12 feet away from the screen.
What can I do to reduce bounce-back?
Some bounceback is to be expected in the indoor golf industry. You want the ball to return to you gently after hitting the screen. But, depending on how you hang/install the screen, the distance you stand from the screen, the strength you hit the ball, and the club you use, you may find the golf ball bouncing back from the impact screen faster than you would like. This article 'Troubleshooting Impact Screen Bounce-Back' walks you through everything you need to know.
Won’t my impact screen get wrinkled if it ships folded?
Temporarily, yes. We suggest removing your screen material from the shipping package immediately upon receipt. When a product ships folded in a box or if you leave your screen in long-term storage, you will see fold marks when the material is first pulled out of the box, as any textile will have.
Time, screen weight and gravity will relax fold marks after the impact screen has been installed. This process may take a few days or up to a few weeks depending on how long the screen was left folded.
Can I iron or steam a golf impact screen?
We do NOT recommend ironing your golf screen, simply because it is very easy to damage the screen. And we want your golf screen to last you a long, long time. With wrinkles and fold marks, the best thing is prevention. Unpack your new screen immediately, and if you need to store it, fold it very loosely. But if you're reading a section on ironing your golf screen, it's probably too late for prevention. Know that mounting your golf screen to a frame with tension, like with our zip ties or ball bungees, and letting it relax for a couple of days will smooth out most wrinkles.
That being said...
We have also had success using a steamer to help get wrinkles and folds out. Using a clean, consumer-grade steamer with distilled water will help accelerate the wrinkle removing process, and should avoid leaving water marks on your screen.
Can I use my impact screen indoors or outdoors?
Our golf impact screens are recommended for indoor use only.
Can I wash my golf screen material?
Check out this article for all our recommendations on 'How to Clean Your Golf Impact Screen'.
How should I safely store my golf screen?
Always make sure your screen is completely clean and dry before storing to avoid spots, mold or mildew. If you plan to repeatedly fold and unfold your screen, do so loosely. Long-term storage and tight folds may take a few days or even a few weeks to relax.
Installation
Which side of the golf impact screen faces the golfer?
|
The front has the Carl's Place logo. Install the screen with the logo at the bottom left of the enclosure. The front will always be folded facing in to protect it, and the back will be facing out. For a long-lasting screen make sure to use the correct side for impact. If you purchased a finished edge screen you can also use the grommets to differentiate the front from the back of your golf screen. The front of the grommet has a smooth, rounded, and aesthetically pleasing appearance. The back of the grommet has a rim or raised ridge along the inner circle.
|
 |
| Standard Impact Screen: The raised open weave side with a herringbone pattern faces the audience. The back has straight rows of thread. |  |
| Preferred Impact Screen: The raised tight-knit side with a herringbone pattern faces the audience. The back has straight rows. | 
|
| Premium Golf Impact Screen Material: The front has very straight rows which face the audience. The back has a very tightly woven squiggle. |  |
What fasteners should I use to hang my golf screen?
Most customers who purchase a finished edge impact screen will also purchase ball bungees, available in 6-inch or 9-inch lengths. Remember to fasten it in such a way that the screen or material has some give. For example, do not bolt the material through the grommet holes as it does not allow enough movement to absorb each golf ball strike and you risk the ball ricocheting back at you. Do not put tension on the screen; you need to allow for some movement.
How do I install my impact screen material or finished edge screen?
The easiest answer is to shop one of our golf simulator enclosure kits where we design it for you and all you have to do is assemble it according to our detailed instructions. If you are looking to design your own solution - keep in mind the 2-inch guideline. The 2-inch guideline is to make sure the framework is no more than 2 inches wider than your screen. Conversely, make sure the screen is no more than 2 inches smaller than the width of your framework. This means a maximum of 4-inches (or 2-inches per side). The trick is to hang your golf screen flat for a nice image, but still allow for some movement.
How far away from the wall or support poles should I mount my impact screen?
We recommend mounting your golf impact screen a minimum of 12-16 inches away from the wall, just to be safe. If you are really good and hit the ball hard you may want to increase this distance. This is also true if you build a Golf Simulator Enclosure or Hitting Cage. Make sure the screen is a minimum of 12-16 inches away from any support poles or you risk the ball ricocheting back at you. Do not put tension on the screen, you need to allow for some movement.
Technical Information
What size grommets do you use?
Our grommets have an outer dimension of 3/4″ and an inner dimension of 3/8″.
Hang Your Screen the DIY Way
You can mount your Carl's Place Impact Screens to any truss, freestanding or hanging system with our 6-Inch Black Ball Bungees or 9-Inch Black Ball Bungees (available in any quantity you can think of. Except halves. Or exponents. Please don't make us do math).
Switch Over to an Enclosure+Screen Kit
This screen is the hero of your sim, but pairing it with a golf enclosure is the ultimate cheat code. You get professional-grade tension and a seamless 'floor-to-fairway' finish without the 'measure twice, swear at the hardware store clerk' headache. It’s a finished, light-blocking sanctuary that keeps all the golf balls safely where they belong.
Care and Use
Cleaning Your Screen
Dirt, dust, grass, ball marks, and more. Everything you need to know to clean your impact screen.
Prevention
How to prevent your impact screen from getting dirty:
- Use white balls without dirt, grass or marker on them.
- Clean your clubs often - it will also benefit parts of your game like ball spin.
- Store your screen in a safe, clean and dry environment - if you ever need to pack it away.
- If possible, stay away from keeping it folded in a box for a long time to avoid longer-term creases and wrinkles.
Read more: 'How To Clean Your Golf Impact Screen, and Make It Last'.
Use the Right Side
Make sure you use the right side of the screen; the front has a Carl's Place logo in the corner. Your new impact screen has a front and a back, and only the front is rated to withstand the impact of real golf balls.
Safety Tips
Please make sure to take proper safety precautions to protect ceilings, walls, windows, cars, and neighboring homes. Keep children, pets, and spectators out of swing range.
Display prices in:CAD